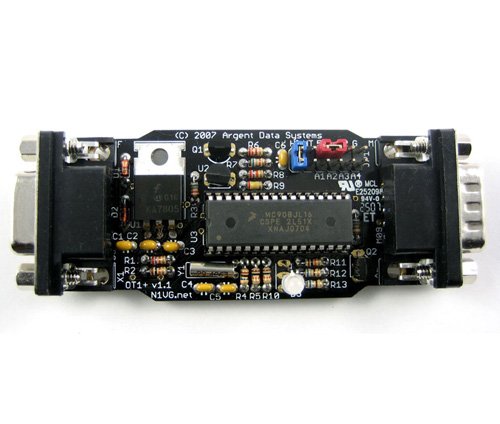
Ordering the OpenTracker+ was painless and arrive in just a couple of days. Packaging is was nice and the correct components were in the bag.
For the build, I inventoried all of the parts and then began with some of the larger yet low-profile components. I did part of the assemble the first night and then finished the next evening with all of the resistors. In all, it took just a couple of hours to assemble the OpenTracker+. I was using a new Hakko soldering iron for this project, so some of the time was spent fiddling with the new iron.
Picture of the parts package
Picture of the assembled OpenTracker+
Once assembled, I ran through the testing procedures at the end of the user manual. One tip might be to put a note in the assembly section of the manual indicating that there are some test procedures at the end.
Everything tested properly, so I hooked it up and it immediately began reporting it's position. Needless to say, I was very impressed with the ease of assemble and ease at which I got it on the air.
Here are some specific observations:
Pros
- Easy assembly
- Nice kit packaging and quick shipping
- Easy to change some basic settings with jumpers
- Software is user upgradeable
- Support forum at Yahoo Groups is very helpful
Cons
- No real assembly instructions other than a diagram, picture, and a couple of "make sure you..." comments.
So, I'm a satisfied customer and would definately by another. As a matter of fact, I have a second one sitting here needing to be assembled. That's later this week...
Here's a quick update having used the OpenTracker+ for several weeks now. I've very satisfied with it's operation and have both units functional. I am very happy with my choice and can't compliment Scott and the other folks on the support forum enough.
![]()

